That is all.
Browse Category For
scrapbook blogs
Showing: 641 - 660 of 1,180 ArticlesDiary of a Scrapbook Room Makeover: Part Three
If you need to get caught up on my diary, here are the entries so far:
PROLOGUE
PART ONE
PART TWO
QUESTIONS ANSWERED
PHOTOS HELD HOSTAGE, DAY 3
And now it’s time for Part Three! Yeah, like, FINALLY! Most of these photos were taken on October 5, which is 10 days ago. This is pretty much what my room still looks like today (10/15/09), other than a few little changes. As always, I apologize for the quality of my photos. My nice digi camera is out of commission because the charger doesn’t work and until the Money Fairy makes a drop at our house, I can’t afford to buy a new one, or a new camera. Thus…I have for you iPhone pictures!
So this is as you look into the room from the dining room doorway. Kids’ homework/crafting table in front, my scrap desk behind that, coffee table and couch back by the window, and the junk corner in the very back left.

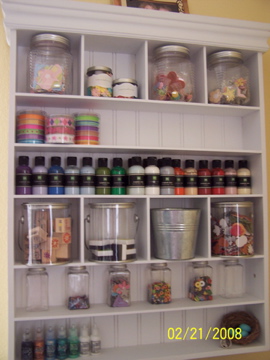
Here is my “cube wall,” which are Store in Style cubes with mostly Cropper Hopper vertical storage of paper/embellishments, and jars with ribbons, chipboard letters, etc. In other words, if there is a fire, this is the stuff I’m grabbing. Yep, one by one, cube by cube. Not. Kidding. What’s that? Oh, of COURSE I’d grab my kids and hubby first! Sheesh.
On the left, the white bin has office supplies I need to find a new home for; they came out of a cupboard in the L-shaped desk. The bag and cardboard box are things I brought home from my office when I was allowed to start working from home. That was in April 2009. Nope. Not unpacked yet. This is one example of things that were dumped in my scrap area and I was too busy to do anything with them at the time, so they just cluttered the place up. Don’t judge. It won’t take long to put the stuff away, I would just rather sort and put away scrappy supplies than work manuals, paperclips, baby wipes, and boxes of tea, wouldn’t you? Procrastinators Unite!….Tomorrow.

Here’s the oak cabinet that used to hold a TV, VCR, old school Atari games, and kids’ DVDs/games; now it’s a resting place for my grossly overpacked SCRAPRACK. I have always had a big crush on my Scrap Rack, and it’s insane ability to sort my scrapbook supplies by theme. But I have abused Scrap Rack. I have overfilled Scrap Rack. Now I hardly ever touch Scrap Rack and we miss each other. I flipped through it a bit tonight and it was embarisken. I have some reeeeeeaaaally old things in there that need to be purged in a big way. Like Creative Memories stickers circa 2001, some Mrs. Grossman’s border stickers, and various shape die cuts from Paper Pizzazz.

Note to scrappers who began after 2007: You are lucky. By the time you started scrapping, most of the products being put out there have been pretty designer-ish and awesome. But prior to that, especially late 1990s/early 2000s? There was some pretty rough stuff out there. You would cringe. So if you don’t know what “Mrs. Grossman’s” or “Paper Pizzazz” means, no worries. You didn’t miss a thing. Trust me.
Here is the new and improved bookshelf #4! It used to be toys from top to bottom. Now the toys have been moved into the new playroom, freeing up space for kids’ crafts. There is coloring, drawing, painting, scratch art, activity books, puzzle books, foam stamps, crayons, acrylic paints, markers, and brushes. Wait, what? That all sounds fun! Do I REALLY have to share with my kids? Hee.
It was fun but sad to purge the coloring and activity books, seeing things my kids had drawn and colored when they were much younger (yeah, it had been awhile since this stuff had been gone through). But I gave the old color books to a friend who’s going to use them in her Sunday school classes so that made me happy and they were easier to let go. I have tons of art and schoolwork from my kids, so in the scheme of things, they had to go. In return, clear and organized shelves – yahoo!

Here is the homework/craft table. See the clear mat in the middle? I got 2 of those at a craft store years ago and they were a smart purchase; the other one is on my scrap desk under my BG mats. They’re great for protecting your table from permanent damage, portable for moving to other tables or counters, and easy to clean. The clear mat was about 1.5 inches too long when I laid it horizontally across the table like this, so I cut the excess off. Guess what I used? My Basic Grey Magnetic Mat. How many times have I said I love that thing?!?! I lined the clear mat up on the BG mat grid, put the metal ruler over it, and sliced down the clear mat with a craft knife. It didn’t go all the way through so I flipped it over and cut in the same place and Voila! Then I used my Creative Memories Corner Rounder to make the 2 new corners match with the existing rounded ones. I was pretty darn proud of myself because that’s about as handyman as I get, LOL! Ideally, I would like this same kind of mat but large enough to cover the entire table. Then again, it’s an old banged up table so I’m not gonna stress on it.

Here’s a top view of the newly cleaned up, cleaned out, organized, and labeled craft carousel. As you scrappers know, this is actually a Making Memories DESKTOP CAROUSEL, intended for scrapbook supplies. I tried to use it as such when I first got it, but it never worked for me. The main problem is that I need to keep my most-used tools in something portable for taking to crops. Even if I used it for least-used tools, the footprint is so big, that it takes up a lot of desk room once you leave it a wide berth to spin around. It really needs to be in the middle of a table or desk, and while my scrap area doesn’t allow for that, it does work perfectly on the homework/craft table, doesn’t it?

The carousel had been on our dining room table for about the last year or so which has been Homework Central. It had crayon marks, broken erasers, pencil shavings, you name it. It was looking pretty beat up and fugly, and was not organized whatsoever. So I took everything out of it, turned it upside down over the trash to get the gookies out, and Windexed it within an inch of its life. Then I lovingly organized and labeled each section. Oh, and I spent about 30 minutes one night hand sharpening all of those regular and colored pencils. Now that was good fun.
See, lookie! Look at my labels! They totally rock, huh? Pencil sharpeners, little tapes, mini gel pens….

Staplers and big tape, scissors, and all that other fun stuff…


The husband and children have been instructed in the proper care of my baby. My baby has been labeled so there are no excuses. If they eff it up, there will be hell to pay. And I mean it! Don’t mess with me, I’m the mommy! And you know our family motto: (Say it with me now!) “If Mommy ain’t happy, ain’t nobody happy….” See? Simple.
Okay, here are the 3 measly shelves I have restricted my books to. I know, it’s riDONKulous but something had to give. Scrap supplies or books? Scrap supplies or books? Hmmmm….SCRAP SUPPLIES! But clearly, my bookies need to be organized, alphabetized, and color coded. By Dewey Decimal System. Yet another project in the wings.

Here in the Corner of Shame #1 are 3 boxes that need to go in the attic (“oh, dear??? honeybuns??? love of my life??? would you please do me an itsy bitsy little favor wavor?? thanks, hun!”). Cuz I don’t do attics. Did you know there are, like, SPIDERS up there?!? And it’s hot. Very hot. In other words, not happening. {Please revert to the family motto listed above…}.
The wire cube and panels sitting on top used to be under my desk; I used them to hide…erm, I mean….STORE a multitude of things. Like Christmas and birthday gifts, a family quilt, my sugar-free cookie stash…you know, that kind of thing. I don’t know if I’ll use them in my scrap room again. If not, they would make great toy storage for the new play room. If you want some of these cubes, you can get them at Target or Costco. Not the most sturdy storage, but they do work and the price warms the cockles of my ever-lovin’, bargain-huntin’ heart.

Here is the front side of my big L-shaped desk. I had 3 of these 12×12 Sterlite containers before; they were on my bookshelves. When I moved the couch away from the front of my desk, I realized *gasp* people would be able to see all the crap I keep under there and also my fat heifer thighs. I decided, “No, this just will not do.” When I realized how perfectly these Sterlite drawers fit, I bought 3 more sets and killed 2 birds with 1 stone: lots more storage room and Fat Heifer Thigh View Blockage. A good purchase, don’t you think? {And I got them on sale for $9 instead of $12 each, hehe}.

That big blue navy thing is my Crop In Style XXL aka Old Faithful. That thing has been jammed full of supplies, crammed into my Honda trunk, and rolled over bumpy hotel entranceways to more crops than I can count. She will be retired this Christmas when I get a new set of crop bags from DH and mi madre.
This clear container is under the homework/craft table. It’s all organized and has scrappy hand-me-downs for the kids to scrapbook with. We make handmade cards a lot, too. My entire extended family and friends could totally be lying to me, but they all say they love our personally designed cards with custom artwork and handwritten messages. And if they ARE lying? Screw ’em.

Here’s the couch, so exciting. Ugly, old throw pillow. Oh, remind me to talk about pillows later. And now you can see the reason my scrap room looks a might bit better than it did last time you were here (see PART TWO, link at top of post). It’s because I stuck a bunch of ugly junk behind the couch. I’m calling it the “I’ll Deal With You Later” pile. It’s mostly old family memorabilia and photos that need to be sorted. It’s such a huge project, I can’t even fathom it right now. So I’m (partially) hiding it. It’s out of the way so I can continue making progress with my room….but it’s like the great white shark under the water while you blissfully swim in the ocean. You might be having fun up top, but you now it’s down there stalking you. Damn shark.

It’s actually been really nice having that coffee table there. Just in the last month or so since I put it there, it’s been used for: Jetmax cube assembly, homework, hubby doing paperwork, a foot stool for kids reading on the couch, a game of table hockey, and a nice big area for me to sort and organize scrap supplies. Unfortunately, it’s also been used to lie on, stand on, and hide under. Hey, nothing’s perfect.
Here is Corner of Shame #2 aka Big Daddy Shame. I think I’ve told you already what most of it is. The two blue bins are monthly kits I used to get from MEMORY WORKS EXPRESS. I’ve always kept them together as a kit but I think I’m going to separate them out. I’m not sure…what do you do with kits? Keep them together or mix the items in with the rest of your stash?

There’s also a wide format Epson printer that I spent boo coo bucks on a few years ago, and never used. I’m a horrible person. I won’t bore you with all the details. I have my reasons. But, yeah, now I need to get rid of it. Sell it? E-waste it? Goodwilll? I dunno. Of course, I would prefer to sell it, even for just $100 or something (I paid over $300 and used it maybe 20 times). But to prove to a buyer that it works, I’d need to spend about $100 on printer cartridges and I just don’t know if it’s worth it. Would it even sell? Bah.
Above the Corner of Shame #2 is my MM Embellishment Shelf. It’s pretty well organized but I now have THIS to install somewhere once it’s painted and cleaned up, so I’m still figuring out what goes where and whether to move this shelf.

This photo is probably hard to figure out, because I was focusing on the scene outside the window. It’s the view into my backyard, the view I see when I sit at my scrap desk. Our backyard has a pretty pool and a gorgeous view, but this dog pen thingee is ruining everything! Must go. Will go soon. We borrowed it from our neighbors when we got LANDRY, who didn’t care to stay in the big dog pen on the side of the house. This kennel is a pain in the arse to return to our neighbors, as all four adults need to take a corner and walk it through a gate and across an acre of their property. But I need to make that happen, don’t I? And those atrociously dirty windows! Disgraceful. When is that window cleaner girl going to do her friggin’ job?!! Oh, wait. That would be ME, wouldn’t it? There is only a little overhang over all three of my scrapbook room windows/slider (no patio cover) and also no grass out there, just dirt, concrete, and gravel. So especially when it rains like it just did, the windows get very dirty, the screens very dusty, and it’s hard to keep up on them. But I must. What a waste of a wonderful view.

Here is the Epicenter of Erika’s Craftivity. Chair, Basic Grey mats, Cutterpede trimmer, flat pack with most-used tools, Ott lite, little tote with scissors and pens, and the main requirement for scrapping, Diet Coke. There’s a single Cropper Hopper vertical file that I was thinking of keeping on my desk as a place to keep projects in progress and/or new purchases until I put them away. Now I have another idea for where to put recent purchases, but I like the projects in progress holder idea. I tend to be a “stacker,” with various piles on my desk. 12×12 piles take up a lot of desk space; at least getting them vertical would save some room.

Also, I put my little bookshelf stereo here. I didn’t think I would, but I really miss having the television in here, just for the white noise if nothing else. So I was compelled to hook up my stereo and play some K-Life and the college radio station also has awesome music. I don’t do well with total silence. It makes me spun up. Eeeeeee!!!!
Here’s the left side of my desk. Blue flat packs full of acrylic stamps and inks, shopping bag with some RAK stuff in it, Ziploc with a scrappy project, white holder for Prima flower jars and skittles, black tote for punches and Xyron “X”, and Amy Butler tote for cards and RAKs to and from scrappy friends. I’ve been slowly cleaning that out, putting stamps and other gifts away. I need a good storage system for or project to make with all those handmade cards that I cherish…maybe bind them into a mini book or something.

Here is the view if I’m standing in front of the couch. Standing ON the coffee table??? Who, ME??? Nah, I would never do that. As you can see, I haven’t sorted through those idea books and magazines yet. In fact, I think the pile has grown larger as I come across more of them. Yes, it’s a sickness. And I don’t care.

Just don’t look under the desk. Move along. There’s nothing to see here….
So that’s a tour of my scrapbook room and how the makeover has been coming along. I’m so happy you’re on this journey with me. Yes, it’s embarrassing to share my major clutter issues and extreme scrapbook supply hoarding. But, oh well, you still seem to like me.
I’m learning so much as I go along; basic scrappy storage things and even things about myself that are deeper and more telling than one would expect from a mere room makeover. Like I’ve learned that I’m happy with how much I cherish my memories and all the “things” that go with it. Yet I don’t have to keep it all. And just because I spent money on something doesn’t mean I have to be guilted into keeping it forever. Selling it or giving it away can bring happiness to someone else, like Sunday school kids, so that’s a good thing.
Please keep checking in with me and cheer on my progress so I follow through and don’t give up. And don’t forget about my 500,000 hits blog candy because we’re coming up on the end….at 499,413 as I post this entry. Good luck!
Michaels Finds: Making Memories, Bazzill, K & Company, Colorbok, and Recollections
We were visiting friends in another city last weekend and I was able to go to a Michaels other than my own. As my friend and I were leaving to go shopping, DH said, “Go ahead and ‘have fun shopping’ (spend money),” so I did, LOL! This other Mike’s had so many things mine doesn’t! On the one hand, it pizzled me off. Like, why is her Mike’s more special than my Mike’s? So. Not. Fair. On the other hand, I decided to take advantage of these extra products and pick up some of the goods in case my store never gets them. Perfect shopper’s logic, right?
First, peep my new alphas. I’ve loved me some K & Company “Wild Saffron” since way back HERE. It’s one of my Top 10 Favorite Lines of All Scrappy Time and, therefore, I own just about the entire line. Well, I did not have these chipboard alphas; had never seen them in fact. So I got two @ $5 each :) Soooo spendy….
Also got these apple green felt letter stickers ($5) by Making Memories…so cute! And some journaling transparencies by Recollections. You get 6 ($3). I love the scallops on the edges, and that these will go with just about any layout. Since they’re see-through, they’ll take on whatever color ya put behind ’em.

Here’s some more Making Memories…the “Autumn Splendor” glitter spiral journaling notebook ($5). Those leaf-shaped pages are my favorite. The yellow sheets say “I am thankful for…” and have some cute pears on them; I noticed pears on a lot of products so it must be a new trend. I’m thinking of scrapping with the yellow “thankful” pages at TG this year, having each family member write what they are thankful for in their own handwriting and collecting them on a layout or in a mini-album.
Keeping with the Autumn theme, we have some brown velvet chipboard alphas by Recollections (only $2 so I got two sets). I took a few out of the package so you can see the cute mixed font. The layered chipboard stickers are from the Colorbok “XY&Z” line; they’re called All Occasion. I love the happy color palette and the “create” sticker the bestest.

These are Travel chipboard borders by Making Memories ($3). Super cute, love the glitter and shiny blingy-ness. I have another set of these in a different theme and love them. I like to cut them up and layer or stack them on a layout. They’re hard to see in the package … I wanted to lay them out so you could see them.

Last but not least, “Just the Edge” by Bazzill Basics ($3). They had several colors but I chose white because then I can chalk, ink, paint, or ‘whatever’ them to match the look I want. Or even keep them white, lol. So many possibilities, right? There are 20 pieces, 2 of each style and, again, I spread them out so you can see each one.

Here’s the part you will NOT believe. Are you sitting down? You sure? Okay. I bought all of this stuff…and none of it was on sale…and I did NOT have a coupon. No. Coupon. I know!!! I truly did not think it was possible for me shop for scrappy goodies at full retail price. I did get a little case of the shakes and I almost couldn’t do it. But then I did. Spent a sickening $40, too. I could barely stand it…that’s just not how I roll.
I also found some new open stock paper at this particular Michaels. It’s by Recollections (the Michaels brand) and you can see it all HERE. I think the Garage Sale line was my favorite; here are a couple sheets from that collection…

.jpg)
I had this sheet from the Birdwatching line in my hand and was ready to pick up more Recollections papers…
.jpg)
…when I realized I was traveling and would have to somehow get 12×12 papers home in a packed-to-the-gills car. So I put the paper back, and hope to someday find this stuff at my own Mike’s where I can buy some later.
Have you seen these items at your Mike’s? Do you have or want any of them? What’s your best find at Michaels lately?
Reminder: Read HERE about how to try and win some blog candy…just over 2,000 hits to go until we hit 500,000!

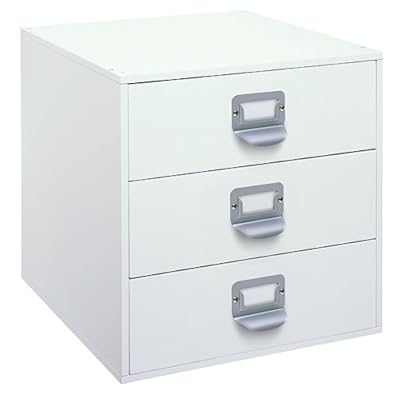
Product Review: Jetmax 3-Drawer Scrapbook Storage Cubes
In my last POST about all the new Jetmax storage items at Michaels, I mentioned that I had a hard time putting one of their 3-drawer storage cubes together…so much so, that I was dreading putting the remaining two cubes together. EILEEN on AMR just asked for storage cube advice in a thread over there, and this was my answer so I figured I’d post it here, too. I also have some storage cube recommendations.
Of the Jetmax brand, all I have are the 3-drawer cubes and the problem I had is the “wood” is so thin, that if you don’t get the teeny screws for the drawer sides in there exactly straight the first time, you never will (believe me, I tried). So then I had to really push super hard on the screwdriver to get them to go in. Mind you, I had to use the teeny screwdriver so there’s nothing to pad your hand while you’re cranking down on it either. You could use a cordless screwdriver of course, but ours doesn’t have a tip that small. There were 4 screws per drawer so I went through this struggle 12 times. Then I went to slide the drawers into the cube (which was also a pain to assemble), and they wouldn’t slide in until the screws were COMPLETELY flush with the sides of the drawers or even recessed a bit. More cranking on the tiny screwdriver and by that time my hand was already bruised.
All that said….maybe I’m the only dummy in America who wouldn’t just go buy a tiny cordless screwdriver head for this one project, LOL! It also takes 2 sets of hands to assemble the cubes themselves, holding the sides perfectly perpendicular to each other while screwing in the tiny screws while you can’t brace it against anything to accept the pressure. Does that make sense? I’m sure some would find these things easy to assemble, but I sure didn’t….
The Store in Style brand is wonderful and uses a much easier cam lock system. You can literally put together the cube itself in 5 minutes. They’re also sturdier and larger, but more expensive. I don’t know if Joann’s or anyone carries them where you could use a coupon. I got them with coupons “back in the day” when Mike’s carried Store in Style.
You might also look into ITSO plastic storage at Target. The cubes take no assembly per se, other than sticking little pegs in each corner (if you want to stack them) to bind them to each other. They have all kinds of drawers, baskets, shelves, and such and you can really customize it. I have 3 of those ~ just the plain cubes ~ that I stack my CM Power Sort Boxes in. If I had known about Itso before I invested in the Store in Style, I probably would’ve done my whole wall in Itso. It’s cheaper and more flexible with the configurations you can do. Here are some Itso REVIEWS; two of them are from scrappers!
Anyway, there’s some more info and photos of all 3 types of cubes HEREand at the bottom of THIS post. If you’re in the market for scrappy storage, I hope that helps ya!
New Jetmax Storage Items at Michaels
I was at Michaels the other night and noticed all these new scrapbook storage items by Jetmax. I made sure to include the shelf sticker so you can see how much each item costs.


This is a cool new storage item that I saw on an end cap. It wasn’t near the scrapbooking, but over by the home decor. I was a little confused by the signage though….are they 30% off or 40% off? LOL


The only Jetmax items I currently own are the 3-drawer storage cubes. I have 3 of them that I bought one at a time using 40% or 50% off coupons. I’ve only put one of the cubes together and I’m dreading doing the other two, because it was NOT a pleasant experience. So my only advice is that if you plan to deck out your scrapbook area in Jetmax products, buy one item first and put it together before you commit. Just sayin….
Ribbon Storage by Cropper Hopper
I saw THIS entry by my bloggy friend, Susan. It’s a wonderful way to store ribbon. My favorite features are that it’s so compact considering how much ribbon is stored, and also that it’s flat and, like she said, you can throw a card or few of ribbon in with your crop stuff or whatever project you’re working on.
HERE’s a “ribbon addict” who started out with her ribbons on a card system like Susan’s, who then switched to a more casual approach. That’s kind of what I did. I used to wind my ribbon around cards like Susan’s, but smaller, and keep them in an embellishment case. But as time went by and I bought and used more ribbon, I got tired of winding and unwinding. It ended up being a hassle. My cards were also too small, I realized too late, and would get lots of creases in them. {That’s another thing I like about Susan’s approach; with the larger cards, I’ll bet the ribbon creases a lot less}. Anyhow, I tend to always be in a hurry to get things done, and a bit lazy to boot, so I also switched to a more “casual” kind of ribbon storage. I keep them in jars now, just loose and crazy.
Honestly, I think my ribbon thanks me….
Reminder: Blog Candy is at Stake Here :)
Just a reminder: If you’d like to enter a comment ~ or tons of ’em ~ to play for a RAK, details are HERE.
I’ve been picking up bits and bobs to include in the scrappy package. In fact, see the shopping bag under the Ziploc on the left side of this photo?

That’s got some RAK goodies in it….Are they calling your name?
Blog Milestone, a Survey, and a RAK
492,348…that’s how many hits my blog has as of right now. Less than 8,000 hits to 500,000! Super cool. To celebrate this milestone for my blog, I’d like to offer a RAK of some scrapbook supplies. Nothing hugely fancy. I’m not sponsored by Making Memories or any of the big wigs….just little ol’ me, LOL! But who doesn’t want free stuff?!?!
Here’s how to play:
1. Leave as many comments ANYWHERE on this blog as you like, and each comment gives you 1 chance towards winning…. 20 comments = 20 chances, and so on…I have made 567 posts, so there are lots to choose from!
2. These comments must be left between now and when my blog rolls 500,000 hits…therefore, the deadline is unpredictable but I wouldn’t hesitate!
3. When time is up, I’ll put all your comment entries into Random.org and let it pick the winner!
4. This is open to USA and Canada readers only. So sorry, but I can’t afford to ship overseas :(
Here’s a Commenting opportunity ~ If you would please answer a few questions to help me make this a better blog:
1. How did you find my blog? Linked from another blog/site, Google search for ________?, etc.
2. Is my blog in your reader, do you have me linked on your blog, or how do you get here when you visit?
3. What topics have I not covered that you would like to see, or what topics most interest you?
Okay, looking forward to your comments and good luck in winning that RAK!! Here’s to 500 grand!
ETA: Don’t forget to include some way for me to reach you. When you log your comment, make sure your e-mail addie is correct and/or that you include a link to your blog. If I pick you and have no way to contact you, I’ll only give 24 hours grace for you to contact me before picking another winner :)
Diary of a Scrapbook Room Makeover: Your Questions Answered
Since I started writing my scrapbook room makeover posts, some of you lovely readers have been asking questions about certain items. I wanted to catch up on answering those, if you don’t mind. Or even if you do….bwaha!
From the FIRST POST, “Diary of a Scrapbook Room Makeover: A Prologue”…
JUDY asked:
“My first question for your organizational knowledge is this: What are you going to do with your stickles? I can’t decide how I want to organize mine. I know they should be upside down, but I also like them in a container that I can just grab and go when I get ready to go somewhere else and crop. So, do you have any suggestions for that?”
Answer: Ever since I started collecting Stickles (yes, you are not allowed to own just one Stickle….if you buy one, you will soon find yourself needing more, and before you know it, you have a Gang of Stickles….I currently have 15 bottles)….Okay, so, ever since I started collecting them, Judy, I’ve been keeping them lined up in anal-retentive, ROYGBIV color order on my Making Memories Embellishment Shelf. This is an older photo, from when I only had 7 Stickles, but you get the idea:
I did hear at some point that it’s best to store them upside down to avoid the applicator clogging but, since clogging hasn’t been a problem for me, I totally ignored that suggestion. It reminds of those pesky exercise tips you see bandied about. I mean, exercise??? Doesn’t apply to me, so why would I take note??? But in the interest of helping out my Stickles Sista, Judy, I went and found a couple ideas for ya…
Here’s an economical route from SHAYLA’S CREATIONS. Looks simple, and it’s pretty to boot.
Tons of great Stickles Upside Down Storage ideas here at OBSESSED WITH SCRAPBOOKING. Now, even though the names of our blogs are similar, we are NOT sisters. But I do love her. She shows people who have more Stickles than I do, which makes me feel not so ashamed. I think my favorite idea is the mini-lunchbox, although then your pretty Stickles are hidden away and their bottled sparkliness cannot add extra shine and glimmer to your day each time you glance their way.
At the bottom of her post, you’ll see where TIM HOLTZ says it’s fine to store them either way, but if you store your Stickles upside down, they may glurb out when you open them. {Glurb is not an official word, if you were to ask Merriam-Webster, but it seriously should be. Are you with me? Let’s start a petition!}. So, it’s sort of like the G.D. ketchup that G.D. glurbs out because I store it upside down in the refrigerator because that’s how the bottle is made and I’m just following directions. Yep, your Stickles’ll be just like the G.D. ketchup. Just sayin’….
Judy, I’m sure I’ve answered your question and about 50 others by now, right? So moving on….
Here is a question from my THIRD POST, “Diary of a Scrapbook Room Makeover, Part Two”:
Jkaye asks: “very interested in your JETMAX cubes- do you like them? And are they heavy- as in too heavy to stack on a Rubbermaid like table? I might have to stick with my rubbermaid 3-drawer containers as for the weight is okay for now..I am sure the Jetmax ones would be much heavier..”
Answer: First, let me clarify (see photos below). The stack of cubes I have along the wall (there are 10 cubes plus a half cube) are the heavier duty cubes called Store in Style. As for the Jetmax cubes, which are lighter weight and can be found at Target and Michaels, I own 3 of the 3-drawer cubes. However, I’ve only assembled one and haven’t stored anything in it yet. So I’m not an expert on the Jetmax cubes, but they are definitely lighter and smaller than the Store in Style cubes. I did a weight comparison test of the Jetmax cubes and the Sterlite (like Rubbermaid) 3-drawer containers with the 12×12 drawers. I actually weighed them on a scale. The Jetmax 3-drawer cube weighed 15 pounds, and the Sterlite 3-drawer container weighed 5 pounds. So, Jkaye, I’m not sure if putting the Jetmax cubes on your table would be do-able. But definitely do not plan on putting the Store in Style cubes on a tabletop. They are MUCH heavier then the Sterlite containers.
STORE IN STYLE CUBE (3-drawer)

STERLITE 12×12 CONTAINER (3-drawer)

On that same post, YvetteDownUnder {who has a cute, funky, phresh scrap studio} said: “Can I ask you about the Powersort boxes? What dimensions are they? You guys in the US have an abundance of cube options, but we are more limited here in Oz, so I wonder if they would fit in an Ikea Expedit? Most of my photos of now scrapped in albums :) and I need to downsize those that aren’t from multiple photo boxes. I am tempted by the Power Sort, but not yet 100% sold on it. So fitting it into my storage could sway things.”

Answer: To answer this question, I thought I’d pop my azz right over to CreativeMemories.com and find the dimensions of the Power Sort Box for Miss Yvette. But, no, they aren’t listed on the website. Isn’t that a little weird? I mean, how many potential buyers have NOT boughten them (no, “boughten” is not an official word either, but seriously, if we can make “blog” and “snorkel” and “obfuscate” real words, can we not make “boughten” official? It sounds much cooler than any of those other words. Man, someone needs to have a talk with those dictionary people!). Okay, so how many people have not boughten those Power Sort boxes because they didn’t want to commit without knowing the dimensions?? Oh, I get it! That’s their way of forcing you to speak with a Creative Memories Consultant! Ah, yes, mystery solved.
Since I can’t find the dimensions online ~ and as much as my CMC would luuurrve a phone call from me at 2am ~ I decided to get out of my comfy recliner, put my laptop aside, pause “TMZ” on the Tivo, and go measure my Power Sort Box myself. No, really, Yvette, it’s alright. Don’t feel badly. It wasn’t THAT much trouble. Really. (Man, am I making you sorry you ever asked this question? LOL!). So the measurements of the Power Sort Box are: 14.75″ x 13″ x 5.5″. I don’t know if that works with the Expedit but I hope so. They are crack-a-lackin’. I love how they hold so many photos, are archival safe, and you can pull the little holders out to rearrange how they are in the box, to take a chunk of photos to a crop, or just to your desk to scrapbook.
Okay, I think I got all your wonderful questions answered. Thanks for asking, and I hope my answers were helpful. No worries, the smart-assidness was no extra charge. See, “smart-assidness”….yet ANOTHER unofficial word that should be official! For shizzle….
Friday Night Scrap Randoms #4
So the latest scrapbooking industry news is thatAMERICAN CRAFTS purchased PEBBLES INC.! You can read about it HERE on the Pebbles Inc. blog and HERE is a link to the announcement on the American Crafts BLOG. Here is an excerpt from the AC blog entry:
——–
We’re excited to announce the acquisition of Pebbles, an amazing scrapbooking brand that we’re certain will be a great compliment to the American Crafts product lines. Pebbles will remain a separate brand under the American Crafts umbrella. We will continue to offer their current products and plan to introduce new products over time. And the core of Pebbles design team will join us to ensure a continuation of their fun, fresh style.
Pebbles was created in 2001 as an extension of the Pebbles in my Pocket retail stores that are located in Utah. They make simple, cute, and easy-to-use products, including patterned paper, craft chalk and stencils, decorative Chips chipboard shapes, self-adhesive Candy Dots, themed die cuts, ribbon and more.
——-
This sounds like a good fit to me. Their product styles are very similar – think bright, cheerful, fun, and the opposite of shabby chic. I wish both companies luck for a smooth transition and much success in the future :)
Speaking of cheerful and fun, did you know Stacy Julian has a new WEBSITE?!? She re-named her blog from “Altogether Too Happy,” (which I’ve always loved because of the little story that goes with it), to “Playful. Productive. Present.” The new website also has her personal music playlists, her teaching/speaking schedule, something neat called “Sprinkles,” an A to Z list of her favorite products, etc. It’s really fun and colorful, just like Stacy herself. You really should check it out :)
If you’re wondering if I got the SHELF, I won’t know until this Sunday. The lady who’s selling it on Craigslist lives about 50 minutes from me. It happens that I’m going to her town on Sunday for an event, so if she still has the stamp shelf by then, I’ll buy it! I’ve just decided that if it’s meant to be mine, it will be. If not, I’ll know it made some other stamper or scrapper as happy as it would’ve made me :)
My-favorite-band-of-all-time-ever-since-I-was little ~JOURNEY~ was supposed to be on OPRAH today. The theme of the show was to be “Don’t Stop Believin;” with the band performing that song. I think the focus was to be the inspiring story of their “new” lead singer, Arnel Pineda. {Some of the Peas have no love for Journey without Steve Perry, and have dubbed the current version, “(un)Journey” LOL! However, my motto is, “Journey without Steve is better than no Journey at all.”} Anyhow, Journey was rescheduled for next week (Oct. 5) and the rumor is that it was because Oprah had more Olympics stuff to do. I mean, really, Oprah??? I love ya, but you need to get your priorities straight. Olympics more important than JOURNEY???? Pish. I’ve lost loads of respect for you, girlfriend…. Oh, and Chicago did NOT get the Olympics after all. Coincidence? I THINK NOT.
Speaking of Journey, this is interesting….Thursday night at the Farmer’s Market in a California town, there was a FLASH MOB of people walking through the streets singing, you guessed it, “Don’t Stop Believin’.” The story is HERE. Super cool. I keep hearing that song on my favorite new show, GLEE, too. It’s all making this Journey Girl very, very happy :)
I’m hoping to get more work done on my scrapbook room MAKEOVER this weekend. We’ll be running around all weekend, and I need to work some overtime at some point, but I really need to get back in there and make some progress! Thanks for all the great comments, questions, and encouragement you’ve been leaving for me. I’ll try to do a post answering questions soon. Do you have any scrapbooking plans this weekend?
Memory Works: SEI “Moravia” and Jillibean Soup!
For a limited time, MEMORY WORKS (who I’m a consultant for) has in stock:
“Moravia” by SEI…. How about a tease? This is what the Theme Set looks like ($6.00)…

There are matching “Moravia” rub-ons, stickers, and chipboard. I love the rich colors and textures of this line, don’t you?
We also have some new stuff by Jillibean Soup ~ the Alphabet Soup theme set ($6.75)…

…”Bean Stalks” ribbon ($6.00)

…”Journaling Sprouts” ($3.50) in a bunch of colors (here’s one)…

…”Corrugated Kraft Alpha” ($5.00)….super cute and so textural!

…and this stinkin’ adorable “Calendar” stamp ($7.00); you can make your own Journaling Sprouts!

What exactly is the limit on the number of acrylic stamps one could own before you would consider them, say, mentally ill? Because I really need these Calendar stamps…but I’m probably pretty close to that theoretical acrylic stamp limit where you’d say, “Biz-natch, you need to STOP with the stamps already!” Just sayin’…
The Jillibean Soup BLOG has a ton of GREAT layout and project ideas for the above items. I was pleasantly surprised to see that SHANNON ZICKEL is designing for them. I’ve seen her layouts in magazines so many times, I’d recognize her son if I passed him on the street, lol! And hey, whaddya know, Laura Vegas is also on the Jillibean Design Team; I just linked to her scraproom makeover in my last POST. It’s a small scrap world after all…
You can see all the SEI and Jillybean Soup HERE, and also place an order. Please contact me at the e-mail shown HERE if I can help with an order or any questions :) . These items are our Trend Essentials for October…only here while supplies last, or until October 31, 2009. Hurry before they’re gonzo!
A Great Scrap Room Re-Do by Laura Vegas
Until I can get back to working on my own scrapbook room makeover and posting about it, I thought I’d share this with you: A wonderful scrap room redone by LAURA VEGAS. I’m so envious of her Expedit shelves, trestle table, and that scrapping island! Wow, lucky girl. If money were no object, I would use all the same components she did (except white instead of black), and arrange my goodies in the same way. A scrapper after my own {heart}. Here’s a tease…Enjoy!
NSBR: Journey “Separate Ways” Literal Video
Earlier today, I was on TWITTER and saw that Ryan Seacrest (@RyanSeacrest) posted THIS news. Former Journey member and American Idol judge Randy Jackson produced a remake of Journey’s “Open Arms” sung by Boys II Men (you can hear the song by clicking on the link above).
Knowing there are lots of other Journey fans in The Pod, I posted the news OVER THERE. A Pea named Jill said Journey fans should check out the literal version of “Separate Ways” on YOUTUBE, so I did….and I haven’t laughed that hard in a long time! I mean, that video is SO terrible on its own, right? You have GOT to watch this:
[youtube=https://www.youtube.com/watch?v=tgEHOM21j3s]
Stamp Shelf for Storage
This is on Craigslist for only $20:
“Fabulous shelf to store your rubber stamps or ???? 48″ high 29″ wide and 5″ deep with 10 adjustable shelves. Painted Red. $20.00 (you can’t even buy the lumber for that)”

Do I need this?? Should I get it??
The red is super cute but it wouldn’t fit with my scrap room colors. I could easily paint it white or some great color. I don’t have a ton of rubber stamps, as I mostly use acrylic, but do I still need it anyway??? It’s so stinkin’ cute and I love that the shelves are adjustable. I have plenty of free wall space to hang it in my scrap room. But I already have the MM embellishment shelf and it’s full of Stickles, MM embellishment jars of felt flowers, etc., and MM paints. Here is a picture of when I first got it; it’s now more “fully loaded.” I put the dowel rod in the bottom section and have ribbons spools there, I have more Stickles, etc.
See, I don’t really need that cute red shelf, do I? What else could I put on it? I actually love the red color and it would go with the red accents in my kitchen, dining room, and living room. I wonder if I can think of some way to utilize it in one of those rooms?
Ack! I just hate to pass up such a good deal on an adorable shelf. I e-mailed to poster to get the photo, then wrote back to say I’m interested. Will let you know when I hear anything! {{fingers crossed}}
Diary of a Scrapbook Room Makeover: Part Two
I’m slowly making progress on the big overhaul of my scrapbook room. If you’re not caught up, you can read the PROLOGUE and PART ONE, if you like :) But the Prologue is important reading; it’s where I tell you what happens if you make a smart ass comment about how much crap….erm, STUFF I have. Yes, I have a lot of paper. No, you can’t shop here. Yes, I have a life. Blah blah blah….
So, I’ve done lots of furniture moving. This is going to take awhile, so get comfy…
1. Unloaded everything from the desk – underneath, off the top, and in the drawers – and moved it about 2 feet closer to the sliding glass door. I didn’t repack the office supply and computer-related stuff I had in the desk cupboards; need to find a new home for all that. It’s in a pile here somewhere…
2. Unloaded all the DVDs, videos, and board games from the oak cabinet and moved them into a cabinet in the guest room/new play room. Moved a bunch of toys that were along the wall into the new play room. Moved the oak cabinet to the wall where the toys had been. Moved the Scrap Rack to the oak cabinet (temporarily, I think…). Moved office supplies, and office machines (fax machine, transcription machine, etc.) from guest room to bottom of oak cabinet (where movies and games had been). This cabinet is going to be Office Stuff Central…unless I change my mind.
3. Emptied out the legal filing cabinet, moved it from a back wall to align with one edge of the L-shaped desk, and refilled it with the same stuff I had in there before, which are greeting cards, school supplies, and more home office stuff. I gathered scrap magazines and idea books from various places around the house and piled ’em up.

As you can see, it’s time to purge these again. I usually do this about once a year but, yeah, it’s been awhile. A friend that I scrap with recently finished her project of pulling pages and ideas from her magazines and organizing them into page protectors in a binder. I’m so jealous….it was great! So I’m deciding now if I have the time, patience, and devotion to do the same thing. Purge or make “the perfect idea binder,” THAT is the question.
As for all those idea books….I don’t think I’ve EVER gotten rid of an idea book. Something about throwing away a book that I paid $15 to $40 for is much harder than a $5 magazine. But I should look through all my idea books and maybe toss some older ones. I’ll bet I don’t even “scrap like that anymore” for some of them, huh?
4. Moved the table that I’d been using for scrappy stuff (okay, to dump things on…) over to the area by the storage cubes. This will be the famous Homework Table.

5. Moved the couch and coffee table from in front of the desk to behind the desk by the back window. The original plan was to put it flush against the wall and lined up directly under the window (I’m all about symmetry, baby!). But once I got it there, the couch seemed kind of squished over into the corner and the coffee table was somewhat blocking the walkway to the back part of the room. So I tried the couch at an angle, and I liked it. Bonus: It creates a hidey space behind it for ugly stuff, lol. And I felt so “HGTV” about it, too.

6. Unloaded just about everything from 10 Store in Style cubes (see couch pic above), moved the cubes to the opposite end of the room, and reloaded them pretty much the same way. The SIS cubes are now on the wall that the oak TV cabinet used to be on. This is the area I talked about where I have to keep a walkway to get to the slider, so the cubes are a good thing to put here. They fit nicely and I can stack more on top someday if need be (God forbid!).
I first thought about configuring them like this, with a kind of “turn the corner” at one end….

…but decided not to. The positives were that it would be a little different-looking, and it would create a handy little empty space back there in the corner to store crop totes or something. But the negatives were that it made the walking path a bit too slim, and put the cubes right next to the cord for the blinds. And when I put embellishment jars on top of the one by the door, they would block the light switch. No super big deal, but I just decided to go with putting them all flush against the wall, like this…

All this furniture moving happened way back on 9/10 (it’s now 9/27!), so when I say “making slow progress,” I’m not exaggerating. It took me awhile to remember and write all this down, the order I did things in. It was quite the feat of engineering to move things AROUND the room while still having everything IN the room. I apologize for any dark photos but most of my madness occurs late at night after everyone has gone to bed. Man, you should’ve seen the wide eyes of my husband and kids when they came out the morning after all this! They were like, “You moved ALL that by yourself!?!? The couch???” and I’m all, like, “Desperate organizers take desperate measures.” (Like, totally…I did all that “like” stuff just to annoy you). Then the daytime photos are overly bright because of the sun coming in all the windows, so I can’t win, lol.
Once the furniture was in place, I’ve just been slowly putting things away, whether within this room or the other parts of the house where they belong, and below is what the room looks like as of today.
Down there is the new back half of the room, with my cool slanty couch, and my corner of chaos. The couch was my dad’s before he passed away so it’s sentimental. Luckily, it’s also functional so I have an excuse to keep it always and forever. That big tub is all the paperwork from my two scrapbook businesses, MEMORY WORKS and Calla Memories. I can get rid of most of it. I just need to go through it and save some paperwork for tax records and such.
The white shelving unit has all my mini album stuff – supplies and some completed albums – but I want to get rid of that shelf and find another way to store my mini album kingdom. That’s actually a shoe shelf so I’m hoping to then move it into my closet and use for, oh, I don’t know…..SHOES???
The basket on top of the white shelves contains letter stickers, which were all nicely sorted by color at one time, and easy to thumb through when I scrapped. Then….I discovered THICKERS. Dun dun dun dunnnnnnnn! I use Thickers lots and I buy Thickers lots. I have a Thicker addiction and I hope there ain’t no cure! But, yeah, I need to go through that basket and purge some old alphas I’ll never use. Like the first major set I bought oh so many years ago, of punch out alphas (I think they were by COLORBOK) in every color and pattern known to man (including plaid and leopard!), in a bubble font, a lollipop font, etc. Eek. Perfect for the kids to use on school projects but NOT for my scrapbooks).
The black boxes are POWER SORT BOXES from CREATIVE MEMORIES and that’s where most of my printed photos are. But photo and memorabilia organization is an ever-changing and never-ending project/battle for me. I’m not even gonna’ GO there right now. The white cubes they’re in are ITSO brand from TARGET. As you can see, I had more photo boxes than Itso cubes, so I bought another Itso from Target when they were on sale recently. (If I remember right, I paid $12 instead of $20). You can see it on my desk in the next photo.

Below is my mess of a desk, and my flooded floor (flooded with scrap crap, that is). There’s the new Itso cube, and one of my new 3-drawer JET MAX cubes. Actually, “new” is relative since I’ve collected 3 of these units over time from MICHAELS using 50% off coupons. I’ve just never put them together, knowing I had this big re-org project coming up. Recently I assembled one and, man, are they a pain in the asset! Don’t get me started. If you’ve put these together, you know what I mean. (I feel sorry for THIS poor scrapper!) I’m dreading the assembly of the remaining 2 but I shall do it, I shall.

I’ve done a little more work on the Wall of Cubes and this is how they look as of now…

The cubes themselves were already pretty organized before I started this crazy project, as they contain the staples of my scrapbook world: Bazzill cardstock sorted by color, die cut/shaped papers, extra page protectors, scrapbook projects, etc. Most of the vertical files by CROPPER HOPPER are sorted by manufacturer and include patterned paper and all embellishments from that company. They could use some tidying but for the most part, the vertical files are good as they are. The gingerbread jars on top, however, are another story. When I first got them way back when on Craigslist (read about it HERE), I had them organized pretty well, but over time I lost control and just started throwing new things in with no rhyme or reason. I’m going to do a post soon about using 2 of the jars for my chipboard letters. There’s one full of flowers, and the rest I plan to use for random embellishments by color. I also put my ribbon jars back on my cubes…ribbons are sorted by color. I love my cubes and jars…they’re my favorite part of my scrapbook room. Can’t wait til I get this part totally done! My pretties, LOL…
So, that’s where I’m at for now. Thanks for sticking with me. I promise I’ll get done eventually, but real life has to come first, so it’ll continue to be slow progress. But progress is progress, right?
Making Memories 12×12 D-Ring Albums
Okay, so I’m doing a BOOK OF ME, thanks to my friends at AMR. I only have a few pages done but this is definitely a project I’m going to continue with throughout my life. I’ve been putting my completed pages in a 12×12 postbound album I had already, an older one by Chatterbox. But … and I’m peeved … the album cover is warped even though it’s been stored properly since I bought it. So I need something else to use.
ETA 9-27-09: Okay, I finally took some pictures….

It’s hard to see in a photo but look at the top 1/3 of the album. It’s all wavy. Here’s a little better view.

Let me just say it looks much WORSE in person.
I’ve been thinking about going D-ring for this album, even though I’m pretty firm on sticking to Snapload for my everyday family albums. I hate the D-ring “interruption” in the middle of 2-page layouts, which is what I mostly do in my family albums. But so far, these BOM layouts have been 1-pagers and most will probably continue to be. So why not get a D-ring, right?
Well, the other day I was placing a MEMORY WORKS order for a friend from the crop I went to last Saturday. Tangent: She is getting these, from the Fancy Pants “Christmas Magic” line……sooooo pretty:


Anyway, I thought what a shame to pay $8.45 for shipping for just 2 little things, and have all that empty space in the box, right? I mean, it’s a travesty of some sort, yeah? So I’ll just search around the sale items at Memory Works and see if I can find something to add. You know, something I NEED not just want. I opened the SHOP OUR PRODUCTS section and noticed there was a new section called “Limited Time Only,” which are products they now have a limited quantity of and won’t be able to get more from the manufacturer (I tell ya, girls, it is SUPER hard to stock a scrapbook store or reselling company these days, with the limited and unpredictable quantities being released by manufacturers…not their fault, “it’s the economy,” right?).
So what do I see but this! The perfect color. The perfect design. THE PERFECT D-RING ALBUM!

It’s the Making Memories 12×12 embossed leather D-Ring ALBUM for only $20!! Yep, 20 bucks and with my consultant discount it’s only $16. It’s hard to see in this pic, but it has a pretty embossed design on it. They have several colors….light blue, mocha brown, red, pink, black, and yellow {you can see them all HERE} and it was hard to choose. But I went with pink since it’s one of my favorite colors, and it’s girly and “all about me.” LOL I also got some extra pages ($6 for 10 minus my discount).
If I can order one (or several) for you, please let me know. Just click HERE for info, or up in the top right where it says “I’m a Memory Works Consultant.”
Anyway, I’m so very happy…only $16 (plus $4 to split the shipping with my friend’s order) for a leather, embossed, D-ring album…I’m still in shock, but happy. And pretty in pink! Have a great day…
ETA 9-27-09: My new album is here!! So pretty….. and not warped, LOL!

Gypsy by Provocraft / Cricut
Gypsy, Gypsy, Gypsy! I’ve been hearing this name for months, and I have purposely ignored it. Like a 2nd grader with my fingers plugging my ears while I sang, “La la la! I. can. not. hear. yooooooo!” All I knew was that it was some kind of handheld gadget that interacts with your CRICUT machine. I “only” have a first-generation BABY BUG…

So I figured this Gypsy thang didn’t even apply to me, that it was for the fancy dancy EXPRESSION.

And I figured if the Gypsy DID apply to the Baby Bug, I would still ignore it til it went away.
Do not. Need. More scrapbooking gadgets.
I tell ya’, it was hard to resist researching the Gypsy; I like to talk about new products here so we can all be edu-muh-cated together. I successfully avoided knowing what a Gypsy really was for a long time … until tonight.
As always, I recorded HSN SCRAPBOOKING and it happened to still be on when I turned on the TV tonight. JINGER ADAMS from ProvoCraft was presenting…

They had me at “hello.”
So let me tell you what I learned by watching the Gypsy demo on HSN tonight:
~~~~~~~~~~~~
It’s a little handheld thing that you can carry in your purse, and “design on the go” … sitting at the doctor’s office, whatever. You save your designs, then cut them when you get home.
Yeah, it’s expensive … freakin’ $300 even on HSN. The price during the “World Launch” is $299.95 and the regular HSN price will be $349.95. But you get a bundle that’s worth $483.96, with a sleeve, carrying case, stylus, AC adapter, car charger, cartridge connect card, 2 cartridges pre-loaded (Gypsy Font and Gypsy Wanderings), and a Don Juan cartridge. And they have free shipping tonight. And 5 flex pays of only $60. They couldn’t make it more tempting if they tried.
HSN hostess SUZANNNE RUNYON pointed out that “craft stores” (we know she means Michaels) will sell the Gypsy for $299, with no extras, and you CANNOT use the coupon. Just so ya know…
On the screen, you can view and layout a mat that is 6×12″, 12×12″ or 12×24″, just like the mats for the different Cricuts. Yep, I can use it with my Baby Bug, after all. Curses!
ALL available Cricut cartridges can be viewed on Gypsy, but you can only cut from the ones you actually own. It’s a great way to preview what’s on each of the cartridges to see if you like them and would use them.
You can update your Gypsy via your computer, so the cartridges and features will always be up-to-date.
The sizes you can cut things are not restricted by the 1/4 inch like on the Cricut…you can get them down the decimal. For instance, Jinger designed something that was 2.14 inches or something.
There is a Search function. Jinger did a search on “flowers” and it pulled up every flower from every Cricut cartridge ever made.
——– You can weld words. ———–
You can drag and drop your design all around the “mat” so it cuts where you want it to.
~~~~~~~~~~~
Then I started searching around online and found some more 4-1-1, like this:
You can buy Gypsy accessories beyond what comes in the HSN bundle:
Silicon Skins in many designs
Screen protectors
Colored styluses
Colored lanyards
So, yeah, now of course, I want a Gypsy.
Crap.
My last concern, my last saving grace, was the fact that Cricut has not been overly Mac-friendly (i.e., Design Studio is PC-only), and I have a Mac so I’m safe, right? The Gypsy prolly doesn’t work for us Mac Girlz {fingers crossed, oh please please please please…). So I went to the Gypsy FAQ PAGE and here is what I found:
——-
How is the Gypsy™ updated/upgraded?
The Gypsy™ is updated by connecting it to a PC or a MAC with an Internet connection.
Does the Gypsy™ work with Macintosh computers?
Yes, the Gypsy will be compatible with MAC OS10.
——-
Well, there goes that!
Okay, one last ditch effort to NOT want a Gypsy, although I admit it’s weaker than Denny’s coffee: The Gypsy fonts probably suck so THAT will be the reason I can say no this gadget. I found the images for GYPSY FONT and GYPSY WANDERINGS. And I saw them on the display boards during the HSN demo, where they’re all cut out with colored cardstock and you can see them much better. Guess what? Yeah, LOVED them! And the DON JUAN font, too, which you can normally only get when you buy a Cricut CREATE. They’re all very versatile with cool images that I would definitely use.


I couldn’t copy a Don Juan sample here, so click THIS to see one, please.
HERE is the link to all the Gypsy information by Cricut. HERE are a bunch of demo videos. You gotta check out the ROGUE GYPSIES … too funny!
If you’d like to see the HSN presentation, check out the rest of the HSN Scrapbooking shows I see on their schedule.
5-6am
8-10am
1-2pm
6-7pm
These are PST; look HERE if you need to run another time zone.
If you want the Gypsy now but, like me, can’t afford it and really shouldn’t get it, check HERE and see if the Peas can talk you down off the ledge. They make some good points: Use an iPhone app to do the same thing. Use all that money for other scrappy stuff, SCAL, or Design Studio. For a bit more, buy an Expression. Use a coupon code, try to win one, or wait for the price to come down. You know, that kind of thing…
ETA 9/24/09: I very much WANT a Gypsy, but I’m not getting one anytime soon. Not in my budget :( And I can’t ask for it for Christmas, as my big-ticket Christmas gift has already been purchased by my DH and mom….I asked for a new set of crop bags. Will do a post on those soon…
So, what do you think about the Gypsy? Is it a “must have” or can you resist it’s magnetic pull?
Diary of a Scrapbook Room Makeover: Part One
Okay, time for Part One of hopefully many posts in my scraproom makeover diary. You can read the Prologue HERE about why I was skerred to write about this in the first place…
I suppose I should start by explaining my current scrap space situation, and why it was time for such a major “makeover.” For about 6 or 7 years now, my scrap space has been shared with my kids’ play room, which consists of the majority of their toys, games, and puzzles, a TV with VCR and DVD player for watching movies, and a couch. The couch is perpendicular to the wall and kind of splits the room in half. Behind the couch is where my scrap space is. I have a large, L-shaped office desk and matching file cabinet, a table, and 10.5 STORE IN STYLE cubes like this….

…mostly open cubes but a few with doors or drawers. Then I have 2 of the 4 sets of shelves along the wall (some of my books [yeah, the other thing I hoard] and the kids’ stuff is in the other 2), and various Iris carts, containers, and mish-mosh storage items. I also hide a lot under my mondo-desk (wink).
As you can imagine, this was already a lot of stuff and two busy purposes to fit into one room, even though it’s good-sized. I have always liked sharing my space with the play room because the kids and I hang out in there a lot together. Or at least we did, until it also became “the dumping ground room.” That was not supposed to be the plan, LOL! Look, I’m a busy mom. Due to this stupid economy, I’ve been working 50-60 hours a week. The kids do sports, I do Bible study, I sell Memory Works, clean, do constant laundry, take care of a puppy, blah, blah, blah. Not making excuses, just explaining how this all got out of hand. I simply haven’t had time to focus on an organized home, as I can barely function on the 4-5 hours a sleep I get per night as it is. So anytime something new enters the house and I don’t have time to make room for it in a closet, or get rid of something else to make room for it, it gets dumped in the scrap room/play room. Ugh. (Hint, I’m preparing you for the photos so you don’t go into a horrible shock).
Here’s my other problem…I’m an admitted pack rat. I’m trying to reform and I certainly don’t want an intervention by my family, so I’m always working on it and fighting it. I get occasional bursts of energy where I purge the pantry, clean out my bookshelves, fill garbage bags with old clothes, etc. But admittedly, things have gotten out of hand in the last year or so. Well, I’m plenty sick of it and it’s time to make it right. Other than the sheer clutter, one thing that really bugs me and has to change is that the kids play area has to be moved. You have to walk through their area to get to mine, and to get to the sliding glass door to the backyard. No matter how much I nag, a fact of life is that they WILL leave toys, books, puzzles, etc. on the playroom floor…right in the path to those two places. And it’s their play area, ya know? They should be ABLE to leave out projects they’re working on, Monopoly games in progress, or art work interrupted, right? I’m just tired of stubbing my toes on all of it. If I step on that little shoe from Monopoly in my bare feet one more time…why I oughta!…..
So I had the bright idea to not only purge and re-organize my scrap space, but to move their play space to the guest room. We’ll move their toys and games, and get rid of some along the way, too :) Their TV and movies can also be moved, which will at the same time provide a TV in the guest room for my mom to watch when she comes to stay with us. This is a semi-tangent…but the way it is now, their playroom TV is about 15 feet away from the living room TV, so when the grownups are trying to watch something, we’re often competing with the kids’ TV. It’s kind of funny, the battle of the dueling remotes…we can’t hear, so we turn up our volume. Then they can’t hear, so their TV goes louder, and before you know it, the house is very LOUD. Now their TV will be farther away and behind a door, so we can now watch R-movies with “the language” and not constantly have to push mute for fear they’ll overhear, and they can watch SpongeBob and his annoying, nasally laugh to their heart’s content, LOL. By the way, I {heart} Patrick….

So. Decided. Playroom stuff moving to guest room. which means that my scrap space has room to expand and breathe. However, as much as I want the kids to have their own place where they can shut the door and watch a movie, or be able to spread out with their games, I also want them to still “need” to be in my scrap area sometimes so we can spend time together. And wouldn’t it be nice to have somewhere else for them to do homework, etc. other than the nice, oak dining room table? Why, yes. Yes, it would! That’s why I’m going to repurpose my scrap table into a Homework Table for the kids, and keep it in my scrap room. They’ll still have a place and purpose in my area, which is really cool. Also, I’ll still have the couch in my scrap room (erm….the cleaned off, easy-to-lie-down-on couch…) so they can come and chill, read a book, tell me about their day, whatevs.
I think I’ll utilize what used to be the DVD/game cabinet (see pic below) to store office supplies, etc. and free up more room in the guest room, where all that stuff currently resides. I used to keep this kind of stuff in a cabinet in there, which will now house the TV and games. Make sense? Just a straight swapperoo!
Being the anal, plan-ahead, worrier type that I am, my wheels are turning about what furniture to move where and how to store what. I pull out some graph paper and draw a diagram for my “new” scrap room. See, I’ve always had to call it a “scrap space” before, but now I can say “scrap room.” Yeah! There are two things I need to work around initially. The sliding door to the backyard means I have to keep a decent walkway available in that area of the room. Also, there are four 5-shelf cheap-o bookcases lining one wall and they need to stay put. They’re mounted to the wall with brackets, as we’re in earthquake country, and I’m not in the mood to unmount and remount those stinkin’ shelves. Besides, this room has a vaulted ceiling and the shelves are on “the tall wall,” also a long, solid wall, so that’s the logical place for them anyway. The best part about the shelves is that by moving the toys and stuff off of them, I’m gaining almost a whole shelf unit for my scrappy stuff….niiiiice. I’m going to move some of my books out of the guest room, and make one whole set of shelves for my books, too.
After 2 tries, I come up with a good room diagram for how want to arrange things. Now, I can drift off to sleep, and dream about someday scrapping in a more open and organized space….Oh, wait, I can’t sleep yet. I have one more thing to do and I can’t procrastinate any longer…
I guess now it’s time for the thoroughly embarrassing photos. I needed DH to move the TV for me when he had a moment, so that’s the only thing missing from the original (highly cringe-worthy) status of this room. Gulp! Here you go…

This is the wall to your hard left as you enter the play room area through the open doorway from the dining/living rooms. You can see the slider I’m talking about to the far right. The TV sat on top of that oak cabinet, and it’s filled with games and DVDs. All those pieces of stacked wood are to construct the hutch that goes with my desk, but I decided not to use it after all, so all those pieces are going in the attic. Those old toys are trash and we’ll see if we can use the plastic baskets for toy storage or something, or maybe to hold outdoor toys in the garage?
As you will see, this is the room to dump plastic containers that have rotated out of use. And I don’t know if you can see them, but behind the hutch pieces and then leaning toward the door frame, there are pool cues. Yes, pool cues. Growing up, my grandparents had a pool table in their rumpus room. Every time we’d visit them, all the kids would play pool. When my grandpa, then grandma, passed away, my mom asked what I wanted from them to keep I chose were the pool cues, among some other things. We had a pool table at the time (in this room, in fact) and I wanted to remember my wonderful grandparents and how much fun I had at their home whenever WE played pool. So, even though I have no practical use for pool cues now, I haven’t been able to get rid of them. I have such a hard time letting go of sentimental things like this. But I will. I’ve decided to take photos of them, and scrap this little story about them….and let them go. See? I’m learning…. Okay, time for another upsetting photo…

This actually disgusts me to look at, how ugly and horrible this room is. Here’s the couch we can no longer sit on, because things just get dumped here: A box of wedding china, a globe, boxes of toys given to us, pictures that need to be hung, a box of sentimental baby items I want to keep, newspaper with an article to scrapbook, a DVD to put away, another empty plastic bin, an empty Memory Works box to break down and recycle, etc. Behind the couch is my L-shaped desk with an over-full ScrapRack (major purging will happen there!). Man, don’t be surprised if I delete these photos from the post when I panic…this is TOO embarrassing!
Okay, deep breaths, deep breaths! It’s going to get all better, with time, hard work, and patience. Someday soon, I’ll look back at these photos and laugh. Right?
Bazzill Basics Cardstock Pack at Costco
Hold onto your wallet, cuz I’m about to enable you! {You know that’s why you love me!} Word on the street is that Costco now has a BAZZILL pack. I haven’t seen it personally, but “katybee8” posted these details on the Pea board:
80 lb. textured cardstock, 100 count (4 of each of the 25 colors) 12 x 12 for 17.99 (18 cents/sheet is an amazing price!)
The UPC code is 40861 92574 (if you want to call ahead and see if your Costco has it yet…)
On the back it says Solid Color Core and it has a list of the textures:
Bling, Washboard, Orange Peel, Grass Cloth, Canvas, Criss Cross and Weave
{Click the BAZZILL link above to see all these textures on their website…)
It can be found in the office supply aisle.
The gal is at work but said she’d post a photo and colors when she gets home, as she hadn’t opened it yet. I will post it here when she does, or you can see the thread HERE.
Methinks I’ll be going to Costco soon….I don’t see it listed on their website, but if you find it, will you post a linkee in Comments pleazzzz….